
Installing Working LED Lights in your Model Police Car
Installing LEDs for Diecast Police Car with Working Lights
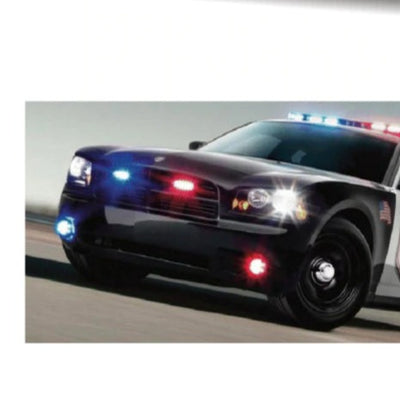
Model police cars and lighted emergency diecast vehicles are extremely popular with our customers here at Evan Designs. So popular in fact that we decided to devote this week's blog post to installing small battery powered lights and police sirens in diecast police cars. The installation isn't difficult, but it is a time consuming project. This article will walk you through the step by step process of how to install micro LEDs and police sirens in your model emergency vehicle. For the purpose of this tutorial we will be using a 1:18th scale model diecast police car, the installation in other diecast emergency vehicles may vary slightly.
Things you will need for micro LED light and siren install:
- 1:18th scale diecast police car or other diecast emergency vehicle
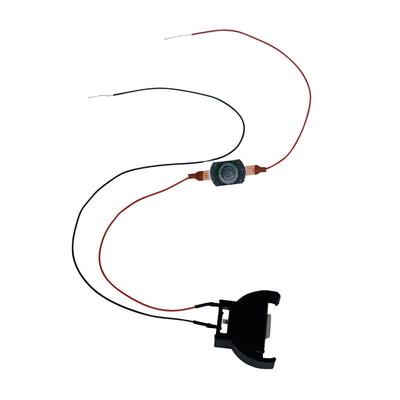
- 1:18 Undercover Crown Vic Lights from Evan Designs
- Evan Designs Diecast Police Car Siren
- 9-volt battery
- Small Phillips screwdriver
- Variable-speed cordless drill with a cobalt drill bit for drilling into the diecast
- 7/64th drill bit
- 1/8th drill bit
- Glue for the LEDs: silicone, superglue or PVA glue are great, avoid hot glue
- Epoxy
- Duct tape
- Solder gun and solder (optional)
- The first step is to unscrew the bottom part of the car to remove the chasse. There are a total of five screws to remove, two in the front, two in the back and one in the center just back of the front axle. For other models of diecast cars, the screws may vary. It is important to note that the screws holding the axle in place are not to be removed. See Figure A1 and A2 for details on screw removal.
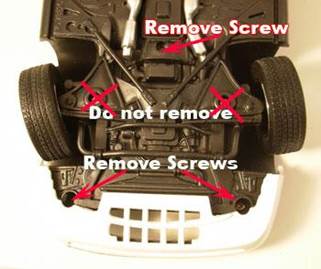
Figure A1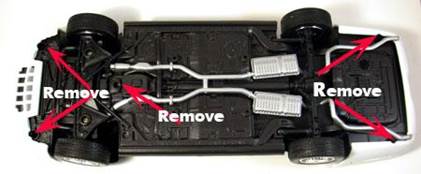
Figure A2 - After removing the screws simply lift up on the underbody of the car and it should separate easily from the top shell. If it does not separate easily, make sure you have not missed a screw holding the underbody in place. You now are ready to install your police siren and mini hobby lights. See Figure B

Figure B - First remove the lenses of your headlights and taillights from inside of the car. Use a soldering iron to heat up the plastic stub that holds the lens in place and then gently slip it out of the hole. Next, enlarge the holes for the headlights and tail lights using a cordless drill with a good-quality cobalt drill bit to get through diecast metal. See Figure C.
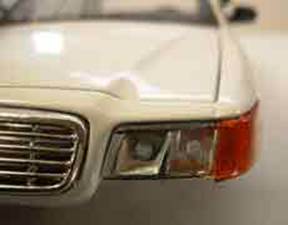
Figure C - After drilling the holes in your diecast police car you are ready to install the LED light kit. At Evan Designs, our mini LED lights come pre-wired with resistors, but they are not pre-connected to the 9 volt battery strap. Glue your police car headlights and tail lights in place using silicone or glue and use small strips of duct tape inside the body of the car to keep the LED wires solidly in place. Let just the tip of the LED poke out of the drilled hole.
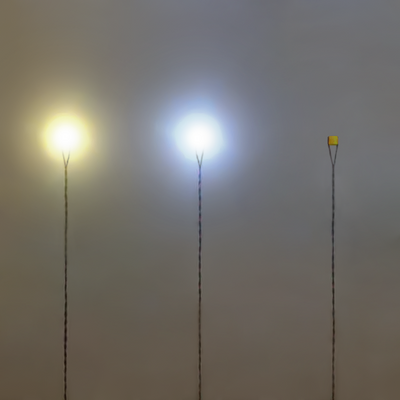
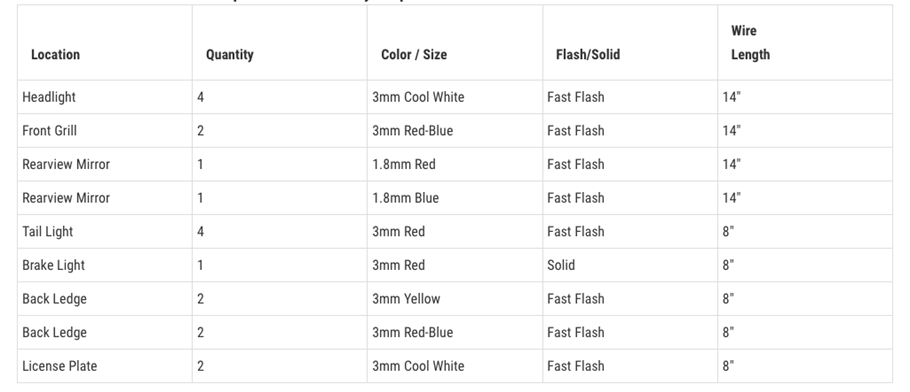
- Proceed to install the rest of the small battery powered lights in the front grill, rearview mirror, back ledge and license plate. Use small amounts of silicone or glue to secure the micro LEDS and more duct tape to keep the wires in place. Refer to Figure D to see the number, color and size of tiny LEDs for each position on your diecast police car with working lights.
- Drill holes under the bumper of the diecast police car for the momentary and on/off switch. Connect a 9-volt battery to the battery snap and put it in the trunk. You may need to remove the spare tire to fit the battery in the trunk depending on the car.
- Next bring all of the black wires from your mini LEDs back to the trunk of the car and connect them to the black wire on the 9 volt battery strap.You can connect them by twisting, or for extra security, use solder to connect the wires. Protect the connections with shrink tube or electrical tape. Complete the same process with all of the red wires from the small LEDs and the red wire on the 9 volt battery strap. Use small strips of duct tape to tape the wires out of the way during reassembly to make sure the wires cannot be seen.
- After installing the battery powered LED lights, it is time to install the diecast police car siren. The police siren is pre-connected to its own 9 volt battery strap and has its own momentary tap switch. Place the siren in the front of the car, silver side facing up, where it can play though the bottom grill. Place a piece of duct tape over the base of the speaker making sure not to cover the holes. Position the circuit board in the trunk and use more tape to hold the wires and circuit board in place.
- Finally, drill holes in the bottom of the bumper of the car for the momentary and on/off switch. There will be two momentary switches, one for the micro LEDs and one for the diecast police car siren.


Search “Evan Designs News and How Tos” blog
Browse by category
Recent articles


Leave a comment